Thursday, February 07, 2013

Revit Apps, Add-ons, Plugins, Extensions and Whatever Else You Want to Call Them

First I begin with a rant, then we get to the good stuff.

1. Autodesk does not put forth unified naming conventions. For instance is this article about Apps, Add-ons, Plugins, Extensions or Tools? What's the difference? I don't know.

2. Apps are a pain to download, install and keep updating. 

3. Most Apps do not behave in a 'Revit' way. In other words, they are one directional. For instance there is an App to change all of the Room and Door numbers. Nice, but you have to rerun the app on the entire model every time you make a change.

4. Autodesk relies too much on third parties to fix or explain their software.

Now that the rant is over, Apps are a necessary evil. So let me try to explain some of the hundreds of Apps, Add-ons, Plugins, Extensions and other tools available for Revit. All of the Autodesk Apps are 'free'. Some of the Apps made by other companies are not free but very low cost, especially if they save time. Therefore I'm not going to focus on price in this list. I'm going to highlight the 'must-have' Apps.

There are four main ways to find Apps.

Autodesk Subscription Site
Autodesk Labs
Autodesk Apps Exchange Site
Individual Company Sites

When you install them they will appear in the Ribbon. I can't guarantee where exactly or what they will be called.


Autodesk Subscription

You can download Apps from the Autodesk Subscription site from the Product Enhancement link.


Autodesk Revit DB Link 2013

What Autodesk says it does:
Import and export data between an Autodesk® Revit® 2013, Autodesk® Revit® Architecture 2013, Autodesk® Revit® Structure 2013, or Autodesk® Revit® MEP 2013 project and an external database, and then more easily maintain relationships of linked data with Autodesk® Revit® DB Link.

  • A grid view of the data enables you to make any final edits before import.
  • Databases can be updated following internal or external changes.
  • The grid control enables you to create Revit shared parameters to add new fields to related tables in the database.
  • Changes to new fields within the database automatically update Revit shared parameters upon future imports.

My Review:

Has potential but needs quite a bit of back-end support and setup.

Autodesk Revit Model Review 2013

What Autodesk says it does:

Automate the process of reviewing and auditing building information modeling (BIM) projects in Autodesk® Revit® 2013, Autodesk® Revit® Architecture 2013, Autodesk® Revit® MEP 2013, or Autodesk® Revit® Structure 2013 software with the Autodesk® Revit® Model Review plug-in:

  • Check the accuracy and consistency of a Project or Family against standards set by your firm, your clients, or industry best practices.
  • Correct inconsistencies with a single click or with instructions provided when manual fixes are required.
. 
My Review:

It works as stated and can be useful for projects that impose a standard.

Batch Print for Autodesk Revit 2013

What Autodesk says it does:

Batch Print provides an easy way to print a large number of drawings (views and sheets) from a Autodesk® Revit® 2013, Autodesk® Revit® Architecture 2013, Autodesk® Revit® Structure 2013, or Autodesk® Revit® MEP 2013 software project. 

After preparing the default printer and the Revit software project, use Batch Print to send any number of drawings to the printer and to control the order in which they print. When you start the print job, Batch Print manages the printing of the drawings, requiring no further interaction from you. If desired, you can monitor the progress of the print job using a status dialog. 

Batch Print is compatible with the 32-bit and 64-bit versions of Revit 2013, Revit Architecture 2013, Revit Structure 2013, and Revit MEP 2013 software.

My Review:


Just okay. Can't pick another printer other than the default.

eTransmit for Autodesk Revit 2013

What Autodesk says it does:

With eTransmit for Autodesk® Revit® 2013 software products, you can copy a Revit model and dependent files to a single folder for Internet transmission. You can transmit any model that has been upgraded to Revit Release 2012 or later and saved.

With eTransmit for Autodesk Revit, you can:

  • Copy and detach a Revit model and associated files to a single folder for internet transmission. This removes the typical error messages when you copy central files using the operating system.
  • Locate dependent files automatically and include them in the transmittal folder, helping to reduce the possibility of error. All dependent files are automatically converted to use relative paths so the dependent files can be located by the model.
  • Choose to include related dependent files such as linked Revit models, CAD files, DWF™ markups, decal images, and external keynote files. You can transmit any Revit (.rvt) model that has been upgraded to be compatible with a Revit 2012 software product or later.
  • Choose to Upgrade the Revit (.rvt) model and linked models to the current release.
  • Choose to remove unused families, materials, and other objects from the Revit projects to reduce file size.
  • Transmit models that are using file-based worksharing or server-based worksharing. eTransmit for Revit can also work with non-workshared Revit models.


My Review:
Nice, useful app. Does exactly what it says it will do.

Globe Link for Autodesk Revit 2013

What Autodesk says it does:

Globe Link for Revit 2013 platform products helps users streamline preliminary project planning by enabling them to present conceptual designs in the context of the project site.

With Globe Link, users can publish 3D building information models directly from Autodesk® Revit® 2013, Autodesk® Revit® Architecture 2013, Autodesk® Revit® Structure 2013, and Autodesk® Revit® MEP 2013 software into Google Earth™ mapping service. Users can also acquire site information from Google Earth mapping service and import it into Revit 2013 software applications for building and site layout purposes. Globe Link is optimized for Google Earth version 5 mapping service.

Globe Link is compatible with the 32-bit and 64-bit versions of Revit 2013, Revit Architecture 2013, Revit Structure 2013, and Revit MEP 2013 software.

Content is currently available in English only
My Review:
The scale is off when importing and exporting.You need to purchase the Google Earth Pro for even a remote chance of this working.

Revit Extensions for Autodesk Revit 2013

First I'm going to state that most of these are 'throw-ins'  from Autodesk's purchase of Robobat. I think you might guess how good a 'throw-in' is. That said, there are some useful ones here, especially the Import and Export Apps. 

What Autodesk says it does:
Revit® Extensions for Autodesk® Revit® 2013 extend the capabilities of Autodesk® Revit® 2013, Autodesk® Revit® Architecture 2013, Autodesk® Revit® MEP 2013, and Autodesk® Revit® Structure 2013 software in key areas, including structural analysis, modeling, reinforcement, interoperability and construction documentation. This download contains all previously released Revit Extensions and updates. The Q3 Update includes enhancements to bridge modeling, integration with Autodesk® Robot™ Structural Analysis Professional 2013, and improvements to the reinforcement extensions. Refer to the “Feature Summary” for details.
Robot Structural Analysis 2013 
Integration with Autodesk® Robot Structural Analysis 2013 
Integration with Autodesk® Concrete Building Structures 2013 ***Load Takedown *
Composite Design
Reinforcement Design 
AutoCAD Structural Detailing 2013
Integration with AutoCAD® Structural Detailing 2013 (Formwork Drawings) 
Integration with AutoCAD® Structural Detailing 2013 (Steel) 
Reinforcement Drawings 
Simulation
Beams (Static Analysis) 
Frames (Static Analysis)
Trusses (Static Analysis)
Slabs (Static Analysis) 
Conceptual Form Simulation 
Floor Vibrations Analyzer
Gravity Column Designer
Reinforcement
Beams
Columns 
Continuous footings
Pile caps
Slab openings
Spread footings
Walls
Walls corners
Piles 
Parapets 
Slab corners 
Retaining walls 
Interferences of reinforcing bars 
Automatic Reinforcement Generation 
Bridges
Integration with AutoCAD® Civil 3D® 2013 : you need to have Civil 3D installed and open on your desktop for this to work
Roads and Terrain
Bridge ‐ Concrete slab with girders
Bridge ‐ Concrete box girder 
Bridge ‐ Concrete slab 
Documentation 
Customization of bridge families
Steel connections
Beam to column ‐ end‐plated
Column base

Both of these tools add a connection family to the selected objects. If you need to change a conenction, you will be better to erase the old one a put a new one in place (re-run the add-on).
Timber
Wood Framing Walls

Modeling
Excel® Based Model Generation
Frame Generator
Grids Generator
Import/Export
CIS/2 Import 
CIS/2 Export 
SDNF Import 
SDNF Export 
Miscellaneous
Elements Positioning
Freeze Drawings-makes a dwg of the view you are in and then inserts and explodes that dwg. Not a good tool from a best practices point of view. It would be better if it created a native Revit drawing.
Compare Models
Text Generator: import a txt file and configure
Content Generator: make structural families based upon a parametric dialog box.
Shared Parameters Converter


Roombook Areabook Extension for Autodesk Revit 2013 and Autodesk Revit LT 2013

What Autodesk says it does:
The Roombook Areabook Extension for Autodesk® Revit® 2013*, Autodesk® Revit® Architecture 2013, Autodesk® Revit® Structure 2013, Autodesk® Revit® MEP 2013, and Autodesk® Revit LT™ software helps calculate the surface area of walls, floors and ceiling elements, room circumferences and the total number of furnishing elements within a project.

In addition to the automated detection of room areas and surfaces, this extension helps users configure these elements manually to local requirements, as well as achieve more accurate model take-offs. Quantified results can be exported to Microsoft® Excel® software and Autodesk® Quantity Takeoff (QTO) software.
My Review:

Great. Does exactly what it says it does. There is a video which explains this plugin in detail. There is a part of the video that says that the schedules can be reimported into Revit as native schedules. I could not find out how to do this. 

Space Naming Utility for Autodesk Revit MEP 2013

What Autodesk says it does:
The Space Naming Utility for Autodesk® Revit® MEP 2013 software is an intuitive tool that automatically assigns the names and numbers from architectural rooms to Revit MEP spaces. By downloading the Space Naming Utility for Revit MEP 2013 software, you can eliminate the need to manually assign names to the spaces, helping save time and simplifying your workflow.

Timber Roof Framing Extensions for Revit 2013
What Autodesk says it does:
Roof Framing Extensions for Autodesk® Revit® 2013 software applications is comprised of two extensions that help automate modeling of roofs in Autodesk Revit, Autodesk Revit Structure and Autodesk Revit Architecture software applications.
The Rafter Framing extension enables the definition and generation of various types of “A” frame roof models. Another extension creates truss roof systems.
Structural elements are created based on a selected Revit native roof object. Generated timber roof structures can be exported to Autodesk® Robot® Structural Analysis software to perform further structural analysis and design tasks.
My Review:

Worksharing Monitor for Autodesk Revit 2013
What Autodesk says it does:
Worksharing Monitor facilitates the use of Autodesk® Revit® 2013, Autodesk® Revit® Architecture 2013, Autodesk® Revit® Structure 2013, or Autodesk® Revit® MEP 2013 software in a worksharing environment, in which multiple people work on one project. For workshared projects, Worksharing Monitor answers questions such as:
  • Who is currently working on this project?
  • Is my local copy of the project up-to-date?
  • When will my Save to Central operation finish?
  • Has my request to borrow elements been granted?
  • Are any issues interfering with my work on a Revit software project?
Note: Worksharing Monitor is not useful for standalone Revit software projects, which do not use worksharing to divide the work for a project among several people.

Worksharing Monitor is compatible with the 32-bit and 64-bit versions of Revit 2013, Revit Architecture 2013, Revit Structure 2013, and Revit MEP 2013 software.
My Review:
A must-have for projects that are 'workshared'. Doesn't work with Revit Server yet.

Autodesk Labs

These tools are usually interesting but are not finished nor permanent. This is to be expected because Labs is made for research and development. Don't let that discourage you, there are some good apps here.


Project Chronicle

Really interesting tool, it records your screen, voice AND commands (but not all of them). I see potential in this.


Project Bluestreak

This is an Instant Messenger which will also send updates as to when the model has been Synced to Central. This is very a useful tool as it works with Revit Server (where the Worksharing Monitor does not). This technology will likely replace or change the Worksharing Monitor. 


Level Generator

What Autodesk says it does:

This plugin can be used to generate multiple levels with one command. It also creates plan views and the ceiling views for the new levels. Users can manually draw levels level by level. Building the model that has a lot of levels can be tedious and time consuming. This tool can help generate levels quickly.

My Review:
Simple to use and works well.

Wall Opening Area

This plug-in calculates the sum of opening areas on each wall and stores the values as two shared parameters on walls.


My Review:
Simple to use and works well. The areas are filled out under the Other category in the properties of the wall. You can also use the information in the wall schedule.


Revit IFC Export Alternate UI 2013

What Autodesk says it does:

This application provides an alternate user interface for the export of IFC files from Revit 2013. This new user interface offers additional options not provided in the standard Revit user interface, and provides the ability to store setup configurations into the Revit model for reuse.


File Upgrader

File Upgrader will batch upgrade previous versions of Revit files to the Revit 2013 format. The tool is intended to help upgrade family contents, template files as well as project files. 

My Review:
Useful and simple

Other Companies...

I apologize if I've missed some companies but here are a few of the ones I know of...

Tools4Revit

Smart Family Browser
Nice way of visually selecting and previewing Families. You can filter through folders and projects.

Quick Table

Useful and simple to use. Import Excel or Word Table into Drafting View

Sort and Mark

Very useful, powerful and simple to use. This will renumber anything ie. grids, rooms, doors. Cool thing is, as you add more Grids, it automatically renumbers them. It can also add facing direction of windows, walls, doors etc. 

Ideate


BIM Explorer
Very useful selection and filter tool.

Case Add-in Manager
This tool is used to install and remove CASE Add-Ins from any version of Revit. We will no longer build ClickOnce installers for any of the free tools. You may also notice a little preview for our upcoming subscription tools


External Wall Facings
Very useful. This tool will put a N, E, S or W in the comments of exterior wall indicating direction. Useful for energy calculations and glass ratios.

Selection Set Manager
Simple tool that will remember selection sets. 

Batch Export Families
This tool will export all of the Families in a project to a folder. Nice.

Project Browser
A slick new Project Browser. Autodesk would do well to notice the way this is executed.

Family Browser
Another really nice looking tool that Autodesk should notice. Similar to the Palettes idea from AutoCAD Architecture this tool displays all of the families in a nice graphic display. You are able to make tabs etc. Works across the network.


CTC Watermark
A lot of people ask about how to 'secure' families that they make. This seems to be the only way possible. I wasn't able to try this one as the Revit Express Tools trial expired on my machine.


BIM Object

Not an app as much as a link to the BIMContent website. The website reminds me of Autodesk seek. Nice European content.


Image-O-Matic
Useful tool. This tool will animate a parametric family. Here's a video.


Revolution Design

Run by Stephen Faust this company makes apps and consults on custom ones. He offers three main products; Keynote Manager, Revit Workflow and Selection Master. These tools were obviously made by a Revit user. I gave them a quick try and am impressed. I would recommend that you download the trials and give these a try.

viewRename

This is a great app! I used it by renaming some interior elevations. It will simply name the view according to the room and orientation. Simple, but what an great way to improve a messy Project Browser among other things. 

autoLink
Nice tool for making view references. You can refer to another sheet simply by typing and then the autoLink tool will update the reference if the sheet number changes.

Finish Floors
Again, a nice, simple and effective tool. This tool will make a finish floor in a room with one click.

Keynote Manager
This is also a great app for firms who may already use Revit but are looking to gain efficiency. This suite of tools will allow you to make Keynotes, keep track of when they change and share with spec writers. 


KKM Soft

Workload Monitor
Free download is available. Looks like a good idea but it's not finished. Tracks how long a user is working in a given project. 


Whitefeet

Run by Mario Guttman, formerly of HOK now with CASE. Mario has made some really useful apps here. I plan on reviewing all of his apps more in-depth.


Sheet Manager: Links to an Excel file. Creates or updates sheets in Revit as a bulk editing process.

Revit-Database Link: Connect to either an Access or a SQL Server database and synchronize data in both directions.

Model Builder: Import and export Revit elements in a way that allows geometry exchange with other programs.
Amazing potential for this tool. Exports objects out to excel with coordinates.

Area & Mass Tools: Placing unplaced areas; creating solid forms from areas; and counting the floors in a mass object.

Room Tools: Placing unplaced rooms; creating rooms from areas; and, creating solid forms from rooms.

View Tools: Creating views from rooms; tagging views; exporting images from views; and, creating sheets from views.

This tool is the main reason why I downloaded the suite of apps. This tool is truly awesome. Makes views out of rooms, places views on sheets, makes 3D Section Box views of plan views. Amazing tool.

Parameter Tools: String and number manipulation; relating data between object types; and, importing and exporting of model data.

Family Tools: Exporting detailed information about families, symbols and tags; importing parameters; and, batch processing families.

Schedule Tools: Working with schedules and key schedules with Excel; editing instance values; creating a table and type schedule.

Management Tools: Displaying the various forms of classification use with families; and, managing attachment links.


Door Factory: This app is not cheap but is certainly a good value. It's purpose is to make 'any' door family quickly. You choose units, swings, frames, hardware and more from a logically developed, tabbed dialogue box. I installed the trial version which is limited to single swing doors. I'm really impressed and will be trying their other products. (I discovered that it will not operate if your Windows font size is anything other than 'smallest'. I'm not really fond of changing my windows settings to accommodate an app.)


BIMRay

ColorByNumber: When former Revit programmers come up with an App, take notice. This app addresses the core issue of BIM - managing the information. Many of us understand things better when they are displayed in COLOUR (as opposed to displayed as text or numbers in a schedule). In my review of this product I used it to simply and quickly display walls with different thicknesses in unique colours - totally easy. Also to note, the downloading and installation of this app was very slick. I believe BIMRay will be so important I have made their links 'affiliate links'.


KrispCAD


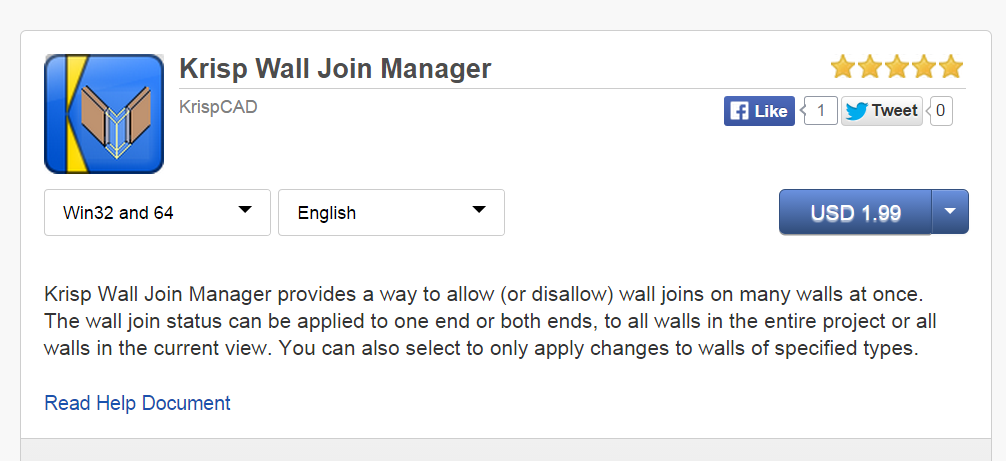
Wall Join Manager


This looks like a simple app which could save much more than $2 worth of time.
Autodesk Site Designer

This was released September 17th, 2014 for Autodesk Subscribers. This set of tools was developed by EaglePoint Software a few years ago. The best part of this tool is the LandXML Import/Export. I have played with the other tools over the years and never really found they were user-friendly enough to recommend. Now that it's 'free' I will spend a little more time trying them out. 

You might want to download the Users Guide here because Autodesk has not been forthcoming with their own.




Tuesday, February 05, 2013

Spiteful CAD Imports-Repost

This article comes from the blog do-u-revit by Dave Baldacchino and Steven Campbell. I'm re-blogging this because I feel it's an important workaround. I also feel that Autodesk should be addressing this in the program and not relying so much on outside apps.

I also wrote an article on the dangers of importing CAD here.


Spiteful CAD Imports

So this week the buildingSMART managers at HOK were discussing ways to get rid of imported (BAD!!) CAD files in Revit projects. Should be something that is easy to do, right? Well, not so easy it turns out.
If you need to do this, you might simply fork out a little cash for a custom plugin. Autodesk Exchange has a good number of such things available and my cohort Brok Howard pointed me to Purge Cads. I have not tried it, but I did confirm with the developer that it does not touch linked CAD files, so for a couple of bucks, this will get the job done fast.
One way or another, you need a plugin. In my case I had Ideate Explorer at my disposal. Unfortunately it lumps CAD Imports & Links together. If you have this plug-in, here’s what you might call “an obscene work-around” to hack your way to the finish line:
  • Assuming you have worksharing enabled, have another user go to the Manage Links dialog and re-load all loaded CAD Links and load & unload all unloaded CAD Links. All we need is to have another user borrow these linked instances so we can get their name in the following step;
  • Go to the Manage Links dialog and try to load/unload the links. You will then get a list of CAD links that you don’t have permission to edit (the ones touched by the other user in the above step). Take note of the names;
clip_image001
  • In Ideate Explorer, select all CAD Imports/Links, then go to the Revit filter and de-select the instances listed above.
clip_image002
  • Now delete the selection and the links will be retained.
clip_image003
Autodesk (or Ideate), if you’re reading this, don’t you think our lives can be simplified by a smidgen? This type of functionality should just be built into the product. The amount of solutions we have to default to via plug-ins is getting way out of hand!

Monday, February 04, 2013

ORUG Feb.21 Meeting


In short, we're going to try to come up with a whitepaper that tackles the major collaboration issues facing AEC...going to be fun.

   
orug logo  

Date: Thurs. Feb 21, 2013
Time: 6:00 - 9:00 pm
Location: Brazen Head Irish Pub - 165 East Liberty Street, Toronto ON (4th Floor)


For assistance, please contact Cait Abernethy at 1-877-438-2231 Ext. 238 or cabernethy@solidcad.ca


Visit our Events Calendar
You're invited to ORUG's BIM Collaboration Problem and Solution Workshop.


The purpose of this event is to connect the Revit users in Ontario who would like to have their say. We discuss issues that range from general Revit use to specific topics that only affect us in this part of the world.

At this event we will discuss problems and solutions to collaboration issues in the BIM process. We will then all share our findings and consolidate them into a 'whitepaper' to be posted on the ORUG website.

Agenda:
  • Welcome and News (10 minutes)
  • Breakout Groups (45 minutes)
  • Group leaders report on findings (20 minutes)
  • Networking 
For more information, please visit the ORUG website at www.orug.ca or email info@orug.ca

We look forward to seeing you there! 


This email was sent to jpolding@solidcad.ca by events@solidcad.ca |  
SolidCAD | 165 East Beaver Creek Road | Unit 15 | Richmond Hill | Ontario | L4B 2N2 | Canada

Tuesday, January 29, 2013

Import Sketchup into Navisworks


Sketchup (6 and lower) files can be brought directly into Navisworks 2013. The materials are also brought over and don't seem to need any markup. This has great application for construction planning and presentations.


Wednesday, January 09, 2013

Revit 2013 Stair Arrows

You may have noticed that when you make a callout a stair, the arrow doesn't show in the view.


This is part of the new Component Stairs functionality. If you want to add the stair arrow and text in a new view you will need to go to Ribbon-Annotate-Symbol-Stair Path and then click on the stair in question.


Visibility Graphics-Annotation Categories-Stair Paths controls the Stair Arrow and text visibility (this is true for the Component and Sketch Stairs). The arrow is now a System Family and can be adjusted.

The Stair by Sketch retains the 'old' integrated arrow and text graphics.


Wednesday, January 02, 2013

Revit Update Error: Cannot Locate Product

When you are trying to install an update for Revit you may get the following error:

"The update release could not be installed because the expected Autodesk product could not be located on your computer.  Make sure that you are using the correct update release for the product."

There are two basic reasons for this error:

1. You have the wrong release number ie. trying to install 2012 on 2013
2. You have the wrong type of product grouping ie. Standalone or Building Design Suite


Revit standalone:

as part of the design suite

More on this can be found on this forum:
http://forums.autodesk.com/t5/Autodesk-Revit-Architecture/2013-Revit-Update-Error-quot-Product-could-not-be-located-on/td-p/.UORmm29X0fg


Friday, December 14, 2012

Elevation Marker Showing on Level Above

An Elevation Mark will show up in every Level that is shown in the Elevation View. You need to be careful of this because it may not be your intention to show the Elevation Mark (Bubble) in every view. The image below is showing an interior elevation on the right which includes just a small sliver of the Level above (Level 2) which means that the Elevation Mark is showing on Level 1 AND Level 2. Should the Elevation Crop Region have to cross the Cut Line instead of the Level to display? I think so.


Lights in GWB Ceiling not working

Seems that the default GWB Ceiling is not allowing lights to be copied or arrayed (unless you use the Radial Array). It gives the old 'Can't place inserts outside of hosts. These elements won't be copied.' message. It's weird because when you turn the ceiling into an ACT type, the lights can be copied and arrayed fine. After this you can turn the ceiling back into a GWB and there is no error message.

Tuesday, December 04, 2012

Visibility Options THE LIST

How many ways are there to display or not display stuff in Revit? Lots. Let's review a few and then discuss Parts Visibility.

Here's a list to get us started:

Visibility Graphics
Worksets
Filters
Mass Object Visibility
Temporary Hide/Isolate
Phases
Design Options
View Range
Discipline
Scope Box
Crop Region
Depth Clipping

And then there is Parts Visibility. You can divide a wall up into Parts for various reasons and then depending on the 'Parts Visibility' setting you see the original geometry or the parts. Here a picture of it...


Here's more to add to this (posted here by Dave Jones):

Checklist: 33 steps to being able to 'find stuff'
Check to see if:
1. The object or category is temporarily hidden
2. The object or category is hidden in the view
3. The object is being obscured by another element
4. The object's category or subcategory is hidden in the view
5. The object is outside the view's view range
6. The view's far clip depth is not sufficient to show the object
7. The object resides on a work set that is not loaded within the project
8. The object resides on a work set that is not visible in the view
9. The object resides on a work set that is not loaded in a linked file
10. The object resides on a work set that is not visible in a linked file
11. The object resides within a group (detail model) and it has been excluded from the group
12. The object is part of a design option that is not visible in the view
13. The object is part of a linked file that is not visible in the view
14. The object has one or more of its edges overridden to display as ''
15. The object is a family and none of its geometry is set to be visible in the view type
16. The object is a family and none of its geometry is set to be visible at the view's detail level
17. The object is set to not be visible at the category's detail level
18. The element has been placed outside the view's crop region (visible extents)
19. The element is an annotation object and does not reside entirely within the annotation crop region
20. The object's phase settings or the view's phase settings prevent the object from displaying in the view
21. The view's discipline is prohibiting the visibility of the object
22. The object is affected by a filter applied to the view
23. The object is subject to an element override, set to background color
24. The object is subject to a category override, set to background color
25. The object style is set to background color
26. The object is constrained to a scope boxes that is not visible in the view
27. The extents of the object itself don't permit it to be seen
28. The object is a mass, and 'Show Mass' is turned off
29. The object's host view has been deleted (area boundaries)
30. The view's scale is prohibiting the object's visibility
31. The object is a linked instance with coordinates too great for Revit to handle
32. The user has incorrectly identified the link instance to which the element belongs
33. The object is in a link that is not in its correct position
34. Wall is subsumed by automatically-embedded curtain wall
35. Something is really far away from the middle of the project and when the view is zoomed to fit, everything disappears
36. Element is white and its edges coincide with other objects. E.g., GWB ceiling in RCP.
38 check your crop regions extents, chances are that a very small portion of the object is outside your Plan Region and causing the whole element to not show up.


Monday, November 26, 2012

Navisworks: Unhide before Clash Detective

A common workflow in Navisworks is to use 'Find Items' to make 'Search Sets' of similar items. Often, people will use 'Hide Unselected' to confirm that 'Find Items' worked. Problem is, the 'Clash Detective' will only find clashes in visible objects. To fix this, make sure that you toggle the 'Hide Unselected' button so that the entire model is showing before running 'Clash Detective'.

Autodesk should modernize the 'Find Items' tool to be more 'Google-Like' as well as more visual.

Sunday, November 04, 2012

Revit Architecture 2013 Bundle Released!

Join me on this 18 hour journey of a Revit project. We will start with client sketches and a blank screen and then move right on to explore schematic forms, coordinate with consultants and produce construction documents. Along the way we use industry-tested Revit best practices to develop our design. Since collaboration is key to the BIM process, we will use worksharing for internal collaboration and file linking for external collaboration. You will not only learn to use Revit, you will understand the workflow and actually have fun on the way!


Wednesday, September 19, 2012

Bolt Hole Family in Columns

How do I add bolt holes to columns and beams as pictured above?
1. Make a family using the Generic Model-Face Based template.
2. Make Reference Planes and Parameters as needed.
3. Extrude the voids into the host and then use the cut geometry tool to cut the voids out of the host.

Friday, August 03, 2012

Reference Tags for Renderings

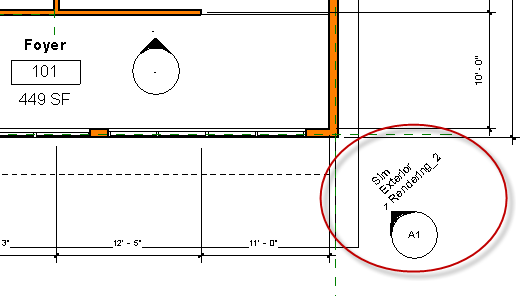
I've always been annoyed that there is no tag for camera views. That fact remains but there is technique that can help. It's referencing a saved rendering view through an Elevation Tag. Here's how to do it...

Elevation Tag
Options Bar-check Reference other View
Choose a saved Rendering View

Make sure to choose Reference Other View before clicking in the drawing area...

Then click...the Elevation marker will show...

When you double left click on the Elevation View you will be taken to the Rendering view

Monday, July 16, 2012

Revit Architecture 2013 Fundamentals Video Released


I'm pleased to announce my latest video for learning Revit Architecture 2013 Fundamentals. A real wall was built in the making of this video. If you hear a distant high pitched giggling, that's just my toddler sending joyful sound waves (and the occasional sippycup) though the new insulated office wall. As with all of my videos we focus on one project from start to finish with no 'off-camera magic'. Everything I do, you will do. You'll start with a basic sketch as illustrated below and end up with a set of documents including lots of colour renderings, plans, sections and details. Hope you enjoy and your feedback is always appreciated.


Wednesday, July 04, 2012

Revit 2013 NWC Exporter not Installing

Thanks to Dwayne Lindsey for this post. It's a little old but still applies when a Navisworks NWC Exporter is not installed by default.
http://navis-infocenter.blogspot.ca/2009/07/navisworks-exporters-not-installing.html

Tuesday, May 15, 2012

Italian Revit Architecture


Nice to see how Revit is being used around the world. A brand new edition of Revit Architecture 2013 guide has just been published. Even if you don't speak italian, the sample files may be worth a look. I will be doing a review in upcoming weeks. The full name is "Revit Architecture 2013 - La grande guida" published by Mondadori. Some of its main features of the book are:

- 380 pages with beautiful examples of italian architecture
- 600+ images
- 450MB examples and exercises

Books can be found on every online bookstore or ordered directly by sending an email request to: 4mshop@4mgroup.it


Friday, May 04, 2012

Caution: Filled Regions Move with Datums

Filled Regions move with Datums. If you were to draw a Filled Region at a Grid or Level, it will be locked to that Level and move with it. Detail Components and Detail Lines do not move with Datums so this can be a little unexpected and strange. 

Workaround: Group your Filled Regions and they will no longer move with Datums. It's a good idea to group 2D items anyway.

Thursday, April 12, 2012

Monday, March 19, 2012

Dangers of Importing CAD into Revit

Importing and Linking CAD should be avoided. But why? And if it is unavoidable, how can I do it safely?
Here are some answers:

Potential Issus with Importing/Linking dwg (CAD) files into Revit

  • Corrupt dwg
  • Large file size and extraneous information
  • Linked CAD can become unlinked but will still display. This can cause confusion as to what the latest file is.
  • Possibility of someone exploding, causing up to 10,000 extra elements.
  • Many AutoCAD layers and linetypes are brought in after an explode
  • Size of CAD needs to be under 20miles in diameter. There can be items which are not part of the primary drawing that are very far away from 0.
  • Visual clutter
  • dwg files from programs like AutoCAD Architecture and Civil 3D may need special plugins to see all of the data.

More Issues...

What Can be Done

In AutoCAD:
Wblock only necessary information
Purge
Audit

In Revit:
Always link, don't import
Current View Only (for 2D dwgs)
Detailed explanation here for Survey drawings

Importing  and Linking CAD Best Practices part 1
Importing  and Linking CAD Best Practices part 2

Imported 3D AutoCAD not Sectioning

Wednesday, February 22, 2012

Canadian Consulting Engineer BIM Article

Here's an article that Bill Wright (Revit MEP Implementation Specialist) and I recently co-authored for Canadian Consulting Engineer, February 2012 Issue page.26.

True Tales of BIM
Consultants share their insights into what it takes to successfully implement building information modeling. As it turns out, managing and understanding people is as important as being familiar with the actual technology...

Revit Structure 2012 Intermediate Training Videos Released

Introducing video training for Revit Structure 2012 Intermediate. This 7.5hr course completes the workflow of a project focusing on industry best practices along the way. Picking up where the fundamental course left off, this course covers intermediate and advanced topics like Phasing, Families and Collaboration. Watch some free sample videos here. The Revit Structure Bundle contains 14 hours of project specific training.

Tuesday, February 14, 2012

Video: Splitting Columns

Here is a video showing the workarounds for splitting columns.
The workarounds demonstrated are changing Vertical Columns to Slanted and/or using the Coordination Monitor.


Monday, February 13, 2012

Video: How to Fillet in Revit

Back in 2006 I did a simple post on how to Fillet. Now we have a video...


I can trim, offset and align but where's fillet?


Fillet is used with a 'draw' tool like line or wall. Here's how to put a radius on the corner of walls;
Start the wall tool and choose fillet arc from the dropdown list.
Pick the two corner walls and draw a preliminary arc.
Pick the arc and adjust the radius by typing the number in the dimension.


Revit Fill Patterns (Hatch Patterns): Part 1

Revit Hatch Patterns: Part 1

Hatch patterns in Revit are referred to as 'Fill Patterns'.
When applied to a Revit material they can be either 'Surface Patterns' or 'Cut Patterns'.
Surface Patterns: Fill Patterns on an element in projection.
Cut Patterns: Fill Patterns on an element when cut.

Revit further divides them into 'Model' and 'Drafting'.
Model: Is always real world size (for instance 8"x4"x2.5"). Useful for measuring brick coursing.
Drafting: Is always a printed size (for instance measured off the sheet as 1/16"). Useful for representing diagonal masonry hatch no matter the scale.

Fill Patterns start life as a .pat file. The same file used in AutoCAD and other programs for hatches.
Here's a site with some free .pat files. As an example, you could download the Brickpat.zip file. This contains a bunch of sample brick hatches in .pat form. Take a look at the thirdrun.pat. These .pat files can be opened and edited in Notepad. Here's an AutoCAD dwg file made by Chirag Mistry which explains how to write and edit a .pat file for Revit. Most .pat files are 'Drafting' patterns according to Revit. In order to make them 'Model' patterns you need to add ";%TYPE=MODEL" to the second line of the pat file (without the quotations). You can do that to the thirdrun.pat file.

Once your .pat file is ready you can import it into Revit. This can be done under Manage-Additional Settings-Fill Patterns. You can then choose 'Drafting' or 'Model'.

Here are the steps for importing a .pat file:
Model
New
Custom
Import
Choose the .pat file. (thirdrun.pat)
Scale (this can only be changed on import)

You can also make simple crosshatch patterns within Revit (no need for a .pat file) . Just follow these steps:

Manage-Additional Settings-Fill Patterns. You can then choose 'Drafting' or 'Model'. 
Drafting or Model
New
Simple
Name
Line Angle
Line Spacing
Parallel Lines or Crosshatch

These Fill Patterns can now be applied to Filled Regions and Revit Materials.

Please read this AUGI thread for additional reference:
http://forums.augi.com/showthread.php?t=57164

Monday, January 30, 2012

Video: Object Visibility Using Detail Level and Subcategories Between Views

In this video we will be learning how to control the visibility of a drop panel between views. We will be exploring  Detail Level control as well as Subcategories.


Wednesday, January 04, 2012

View Filter Walls by Function

I've noticed some Revit users making Worksets in order to manage visibility. While this can be done it's not really necessary or advisable. Worksets can create more work for the user if they are used like layers in AutoCAD. One such example I've seen is a Workset for interior and exterior walls. View filters can be used to filter walls based upon the 'function' parameter in the wall's Type Properties. Walls Types can be defined as Interior, Exterior etc. Then you can make a View Filter based upon the wall's function which is selected automatically.

How to make a View Filter:

Visibility/Graphics
Filters
Edit/New
New Filter, call it 'Interior Walls'
Select 'Walls' as the Category
Filter by: Function
Equals: Interior
OK
Add-Interior Walls
Turn on/off the visibility or override the graphics


Thursday, December 22, 2011

Should Project Managers Learn Revit?

The role of Project Manager or Project Architect is very hard to define. There are almost as many variations as there are projects. Some Project Managers are actively involved in the production, many mostly review drawings, others are managing relationships exclusively. Of course, most do all of the above. In the end, they need to rely on their production past to know how to manage production present. So even though Project Managers will likely not be involved in production Revit they NEED to know how it works. The sooner a Project Manager realizes this, the happy he will be. In fact, the happier we all will be. If a Project Manager doesn't learn how to use Revit, there will always be this murky unknown that causes tension in the team. It's worth the time to send a PM to training. After or even during training the PM should model up something small from start to finish. Within a month or so, the haze will start to clear...

Revit OpEd: Project Coordination - Early Days

Thanks to Steve Stafford and Andre Carvalho. Point of this post is too 'out' the acquire coordinates flaw. If you are a consultant linking in the arch model, acquire coords does nothing for you. You will need to update your model 'manually' in order to keep up with building on site movements. Read Steve's post for more...

Revit OpEd: Project Coordination - Early Days: This post attempts to outline how a project will develop (understanding there are exceptions) when considering multiple firms/models and att...

Revit OpEd: Bending Railings to Your Will

Revit OpEd: Bending Railings to Your Will: Food for thought, what if we used railings for millwork and egress paths? By millwork I mean custom work, not fixed sized cabinets which are...

Friday, December 16, 2011

Revit Structure 2012 Training Videos Released


Introducing video training for Revit Structure 2012 Fundamentals. This 7.5hr course follows the workflow of a project focusing on industry best practices along the way. Watch some free sample videos here:


Revit Structure Box Truss Space Truss Video

Revit (any version) does not ship with a 'Space Truss' or 'Box Truss' that I could find. This is a commonly used member and I decided to make one and let you know how I did it. Here's a video explaining the basic procedure.


Overview Instructions:
  1. Start with a 'Beams and Braces' family template. Call it space_truss
  2. Extrude main chords in right elevation and lock to ref planes.
  3. Extrude a solid in the same elevation and lock to ref planes. This will be web eventually.
  4. Start a new family based upon the 'Generic Model Faced Based' template. Call it space_truss_void
  5. Make a void which will cut out the desired space around the web. This will be one cell which we will array. Make sure you use 'Cut Geometry' on the voids and the host, even if they're not touching.
  6. Load the  space_truss_void  family into the space_truss family.
  7. Constrain and array the space_truss_void  family along the member.
  8. Make an array parameter which distributes the space_truss_void family along the solid web.
  9. Load in to project and enjoy.

Thursday, December 08, 2011

orug: ORUG at AU2012

orug: ORUG at AU2012: Canada was very well represented at AU2011. It was nice to see people from across the country and to meet with many of them. Some members...

Friday, November 25, 2011

BIM rocks Insurance Industry


Please check out this website by Rick Management Consultant Michael Loeters. The BIM revolution is sending ripples throughout the legal and insurance industries. Michael is one of the people who 'get it' and is actively changing with the times. Below is his latest video blog on insurance industry and BIM trends.


Tuesday, November 22, 2011

James Vandezande Presentation at SU

Only a month late...Just wanted to say a big thank you to James for coming up to our SolidCAD University event. We're still getting positive comments about the quality of this event.

Monday, November 21, 2011

Free Revit Videos

Here are a bunch of free intermediate Revit videos, including how to create Revit Titleblocks. More are one their way.

Thursday, November 17, 2011

Revit Wish List


AU is coming up and I need to get my Revit Most Wanted list together. Please comment on the list below:

Open the Revit Database Already!
Most of my wishes revolve around opening up the Revit database. 
We need schedules to query anything from any category. 
Tags need to be able to read data from other objects and categories ie. Doors reading Room numbers.
We need an automated Room Datasheet maker. A schedule that will list everything in a particular room.
Universal Search. Similar to Navisworks, search by multiple conditions and save searches. Or just start typing a find anything.

Automated and Enhanced Project Browser
Project Browser makes and manages Phase and Design Option views automatically.
Drag and drop views between folders.
Automated naming of views ie. Room 101 South Elevation
Automated 3D Section Box views which are linked to the extents of plans, sections and elevs.

Schedules
Print conditional statement colours in schedules.
Schedules to include Family thumbnails.


Phasing Refinement
Phase filters that show multiple phases backward .

Global visibility control
A global option in the Visibility/Graphics box.

Other Stuff 
Universal Annotation Settings Interface
Walls which have a 'centreline' built in for various uses ie.fire rating plans
Edit Family button for Annotation like Levels and View Titles.
Distance lineweight control
Not even going to bother asking for Site tool enhancements.
Two Click Revision Bubbles

Monday, October 17, 2011

Revit OpEd: Elevation Update Update

Revit OpEd: Elevation Update Update: Comment on my earlier post regarding elevation tags not updating properly...seems that it only affects stand-alone project files. If you ar...

Thursday, October 06, 2011

SolidCAD University with James Vandezande-Tomorrow!

Some news on this; due to overwhelming response the registration is now closed. Sorry. I'll do a follow up post on his presentation.

If you're a BIM manager or are trying to implement BIM in your firm you can't miss this presentation by James Vandezande of HOK, New York. This will inlcude an audience discussion so bring your best questions and don't be afraid to ask them! Keep an eye on this blog for our 'post game show'.

Topics for Discussion:
  • Roles and Responsibilities (BIM Manager, BIM Coordinator, Thought Leader, Strategist)
  • Managing Change (new to implementing BIM, what do you do? Sociology/psychology of change, working differently, question everything...)
  • Proper Planning (implementation, training, project execution)
  • Legal issues (BIM deliverables, contracts, liability)
  • Measuring success
Register Here

James Vandezande is a registered architect and a principal at HOK in New York City, where he is a member of the firm-wide BIM leadership and is managing their buildingSMART initiatives. After graduating from the New York Institute of Technology in 1995, he worked in residential and small commercial architecture firms performing services ranging from estimating to computer modeling to construction administration. In 1999, he landed at SOM and transformed his technology skills into a 10-year span as a digital design manager. In this capacity, he pioneered the implementation of BIM on such projects as One World Trade Center, a.k.a. Freedom Tower. James has lectured at many industry events, including Autodesk University, VisMasters Conference, CMAA BIM Conference, McGraw_Hill Construction, and the AIANYS Convention. He is a co-founder and president of the NYC Revit Users Group and is an adjunct lecturing professor at the NYU School for Continuing and Professional Studies as well as the Polytechnic Institute of NYU.


Tuesday, October 04, 2011

orug: Sept.27 ORUG Meeting Notes

orug: Sept.27 ORUG Meeting Notes: Thanks to all who attended our 5th anniversary meeting at the Spoke Club. Here are some highlights from the evening: New venue, lot's of...

Tuesday, September 27, 2011

orug: ORUG Online Meeting

orug: ORUG Online Meeting: Internet connectivity permitting, we will be showing our presentation at the Ontario Revit Users Group presentation on GotoMeeting. T...

Monday, September 19, 2011

orug: orug: Sept.27th Registration Closed

orug: orug: Sept.27th Registration Closed: orug: Sept.27th Registration Closed : Due to the overwhelming response and the capacity of our venue (140 standing), we have to close regist...

Tuesday, September 13, 2011

New Revit Architecture 2012 Intermediate Video

I'm proud to announce the release of our latest Revit training video; Revit Architecture 2012 - Intermediate to Advanced. It's over ten hours of Revit standards, advanced modelling techniques and industry best practices. You can also purchase the Fundamentals, Intermediate to Advanced videos as a bundle. It's even available for your iPad no less!


Autodesk Labs Utilities Project Vasari

Autodesk Labs Utilities Project Vasari

Practice 2.0: BIM Myths and Building Truths | ArchDaily

Practice 2.0: BIM Myths and Building Truths ArchDaily

How To Activate Project Spark - It is Alive in the Lab

How To Activate Project Spark - It is Alive in the Lab

Project Spark and Storm - The Revit Clinic

Project Spark and Storm - The Revit Clinic

Corrupt Revit Project File


"We (Autodesk) have started to see a few more of these types of cases, and a new Knowledge Base document has been created to organize some of the options for this scenario:
Data file is corrupt and needs to be manually recovered
Update: If this message is only happening on one machine. Try freeing up some space on the hard drive, as well as clearing out the TEMP folder on the machine. To find the TEMP folder, hit Windows+R, enter %TEMP%, then delete as many files as you can"

Monday, September 05, 2011

orug: ORUG Meeting Sept. 27th

orug: ORUG Meeting Sept. 27th: Ontario Revit Users Group (ORUG) Meeting When: Tuesday September 27, 2011 from 7:00 PM to 10:00 PM EDT Where: The Spoke ...

Friday, September 02, 2011

Video Post: Filled Regions

This is a short video on how to create filled regions and masking regions in Revit.

Thursday, August 25, 2011

Video Post: Void Visibility Parameter in Family

If you're looking for a way to switch voids on and off in a family, you can't. You can only move them out of the solid. You can mimic the 'switch on and off' effect using the following parameters and conditional statement:

D1 (Length) - This is an input parameter where you can enter the distance from the solid.
D2 (Length) - Forumla=if(VOIDCUT, 0 mm, D1) This is the parameter that you use in the label of the dimension from a ref plane to the void.
VOIDCUT (Yes/No)

To translate:
If the parameter 'VOIDCUT' is checked, then it will make D2 a value of 0. This means that the void object will be inside the solid, thus cutting it. But if  'VOIDCUT' is not checked then the value of D2 will be the same as D1.

Here's a video explanation...


Thanks to Patricks (Mask) for the sample family...
http://forums.augi.com/showthread.php?p=1140127#post1140127

Thursday, July 28, 2011

orug: Open Revit Standards

orug: Open Revit Standards: "This is an initiative by a few top Revit people and soon to grow to a lot of top Revit people. Sharing standards and best practices. You can..."

Monday, July 11, 2011

Arch | Tech: Generative Design and Parametric Structures

Arch | Tech: Generative Design and Parametric Structures: "The July 2011 meeting of the New York City Revit Users Group featured a presentation by Robert Otani, PE, LEED AP and Jonatan Schumacher fr..."

Tuesday, July 05, 2011

Pad not Cutting Existing Toposurface

This issue comes up when you have multiple toposurfaces on multiple phases. Each phase has it's own 'hole' made with pads. Every other phase shows the pad cutting a hole in the toposurface except for the Existing phase. This happens when there are multiple toposurfaces occupying the same physical space but on different phases. The only workaround that I have found is to use the Split Surface tool, cut the shape of the hole (pad) and then delete it.


Friday, June 17, 2011

Revit 2012 Edit In-Place Family Faint Lines

When you edit or create an in-place family the "Halftone" setting is applied to the other linework in the View. The effect of the "Halftone" settings can be adjusted in the Manage Tab-Additional Settings-Halftone/Underlay dialog.  If you feel the linework is too faint, you can adjust those settings by sliding the Brightness slider to be darker.

Thanks to Kyle from Autodesk for helping me with this one.

Tuesday, June 14, 2011

orug: Get Paid by Autodesk to Test Software!

orug: Get Paid by Autodesk to Test Software!: "Autodesk Usability Testing Autodesk is once again looking for people who are familiar with digital creation tools to help us with a new stu..."

Uninstall Autodesk Building Suite 2012 Ultimate

It's great that we can install 15 programs with one click but what happens when (not if) we have to uninstall? A colleague just sent this link to me for that very reason. Only issue is that the application will not uninstall the Revit and Navisworks portion of the suite. You will have to do that the conventional way.

The uninstall application...
http://usa.autodesk.com/adsk/servlet/ps/dl/item?siteID=123112&id=17031128&linkID=9240617

Watch this video for proper uninstalling techniques...
http://usa.autodesk.com/adsk/servlet/ps/dl/item?siteID=123112&id=16883173&linkID=9240697#section13

Thursday, June 09, 2011

Roof Tags

There are no default roof tags that I have found. So here's how you make one in three easy steps:

1. New Family
2. Choose the Generic Tag template
3. Change the Category to Roof Tags

Tuesday, June 07, 2011

Dimensioning to 'Center of Core' in Linked Wall Doesn't Work

I think that the title says it all. Why is this important?

Many of you are using linking on large multi-discipline projects. You will link all of your models into one 'documentation' model. If you cannot dimension to 'center of core' of a wall through a linked file you are missing a key documentation feature in the workflow.

(Nasty) Workaround:
You will have to draw and lock ref planes at the center of core in every wall, in every link. Then you will be able to dimension to the ref plane. ugh.

Autodesk Development is aware of this and plan to fix it. But to add some urgency, please contact Autodesk through your Subscription Center account or your local reseller and log this. If you have a better workaround please feel free to comment...

Check out the Project Photofly Gallery - It is Alive in the Lab

You really have to try Project Photofly. It's a game changer....

Check out the Project Photofly Gallery - It is Alive in the Lab

Thursday, June 02, 2011

orug: May 19th Meeting Notes

orug: May 19th Meeting Notes: "Thanks to the 62 people (and 1 robot) who attended and participated in our meeting. Our two main topics were 'what's new in Revit 2012' and..."

Thursday, May 26, 2011

View Filter: Footings etc.

Make a View Filter if you would like to show footing walls automatically as a hidden line. Here's how (in twelve easy steps!):

1. Visibility Graphics
2. Filters
3. Edit/New Button
4. New, call it 'footing'
5. Pick the Walls and Structural Foundations Categories.
6. Filter by: Description
7. Contains: footing, OK
9. Select the filter you just made 'footing'
10. Override, Projection Lines, Pattern, set to Hidden, OK and OK
11. Select your footing  wall type, Edit Type, and edit the Description to say 'footing'.
12. Select any other footing families or wall types and repeat step 11.

Wednesday, May 18, 2011

Revit 2012 Hangs at Splash Screen or Crashes with Unrecoverable Error

from Revit Clinic post...

1. WSCommCntr3.exe Process
For 2012 products, the Autodesk InfoCenter launches with Revit as a WSCommCntr3.exe process in the Windows Task Manager. The Revit.exe process could potentially wait on this WSCommCntr3.exe process. If you find Revit not getting past the splash screen, open the Windows Task Manager > Processes > WSCommCntr3.exe > End Process.
2. System Tray Applications
Verify if you have an application installed on the workstation, which allow the ability or attempt to minimize an application to the system tray. One example would be 4t Tray Minimizer. If present on the workstation I would test temporarily ending the application \ process to see if Revit 2012 launches as expected.


3. Corrupt WSCommCntrData.xml File
If the WSCommCntrData.xml file becomes corrupt, Revit may hang when attempting to read it at startup. First verify the file exists at the location below and if so move WSCommCntrData.xml when Revit is closed:

Windows Vista & Windows 7 ...\Users\%username%\AppData\Roaming\Autodesk\Revit\Autodesk Revit Architecture 2012\ENU\Components\WebServices\WSCommCntrData.xml

Windows XP ...\Documents and Settings\%username%\Application Data\Autodesk\Revit\Autodesk Revit Architecture 2012\ENU\Components\WebServices\WSCommCntrData.xml

4. Corrupt UIState.dat File
This could also be potentially related to a corrupt UIState.dat file. While Revit is closed, move or delete the UIState.dat file at the location below:

Windows Vista & Windows 7 ...\Users\%username%\AppData\Roaming\Autodesk\Revit\Autodesk Revit Architecture 2012\UIState.dat

Windows XP ...\Documents and Settings\%username%\Application Data\Autodesk\Revit\Autodesk Revit Architecture 2012\UIState.dat

Additional information on Revit 2012 file location changes

Thursday, May 05, 2011